How to Create The Perfect Gallery Wall !
Ah, the coveted gallery wall. Some have it, many want it. With Homepolish designer Savannah Roberts, we’ve put together a detailed how-to for creating your very own! It’s a lot more complicated than blindly hammering nails in the wall and hoping for the best (as you definitely know if you’ve ever experimented). Our resident gallery wall experts have put their heads together and compiled the very best steps for adding punch to any wall in your home/office. Read on brave DIY-er!
Step 1: Inspiration

First up is to determine your personal gallery wall style. Check out Homepolish’s roundup for design notes on all the inspiration you need. Do you like randomness or a grid? Matching artwork or varied? Matching or mismatched frames? Objets d’art? The sky’s the limit.
Step 2

Lay out the pieces of your gallery wall on the floor. Start with a large centerpiece and build out. Use inspiration images from Step 1 to help. If you’re having a hard time deciding on a composition, try this: When you have something you like, snap a picture on your phone. Then make another arrangement. Do this a few times, and then flip through the snapshots. This “editorial view” can help you decide which you like best.
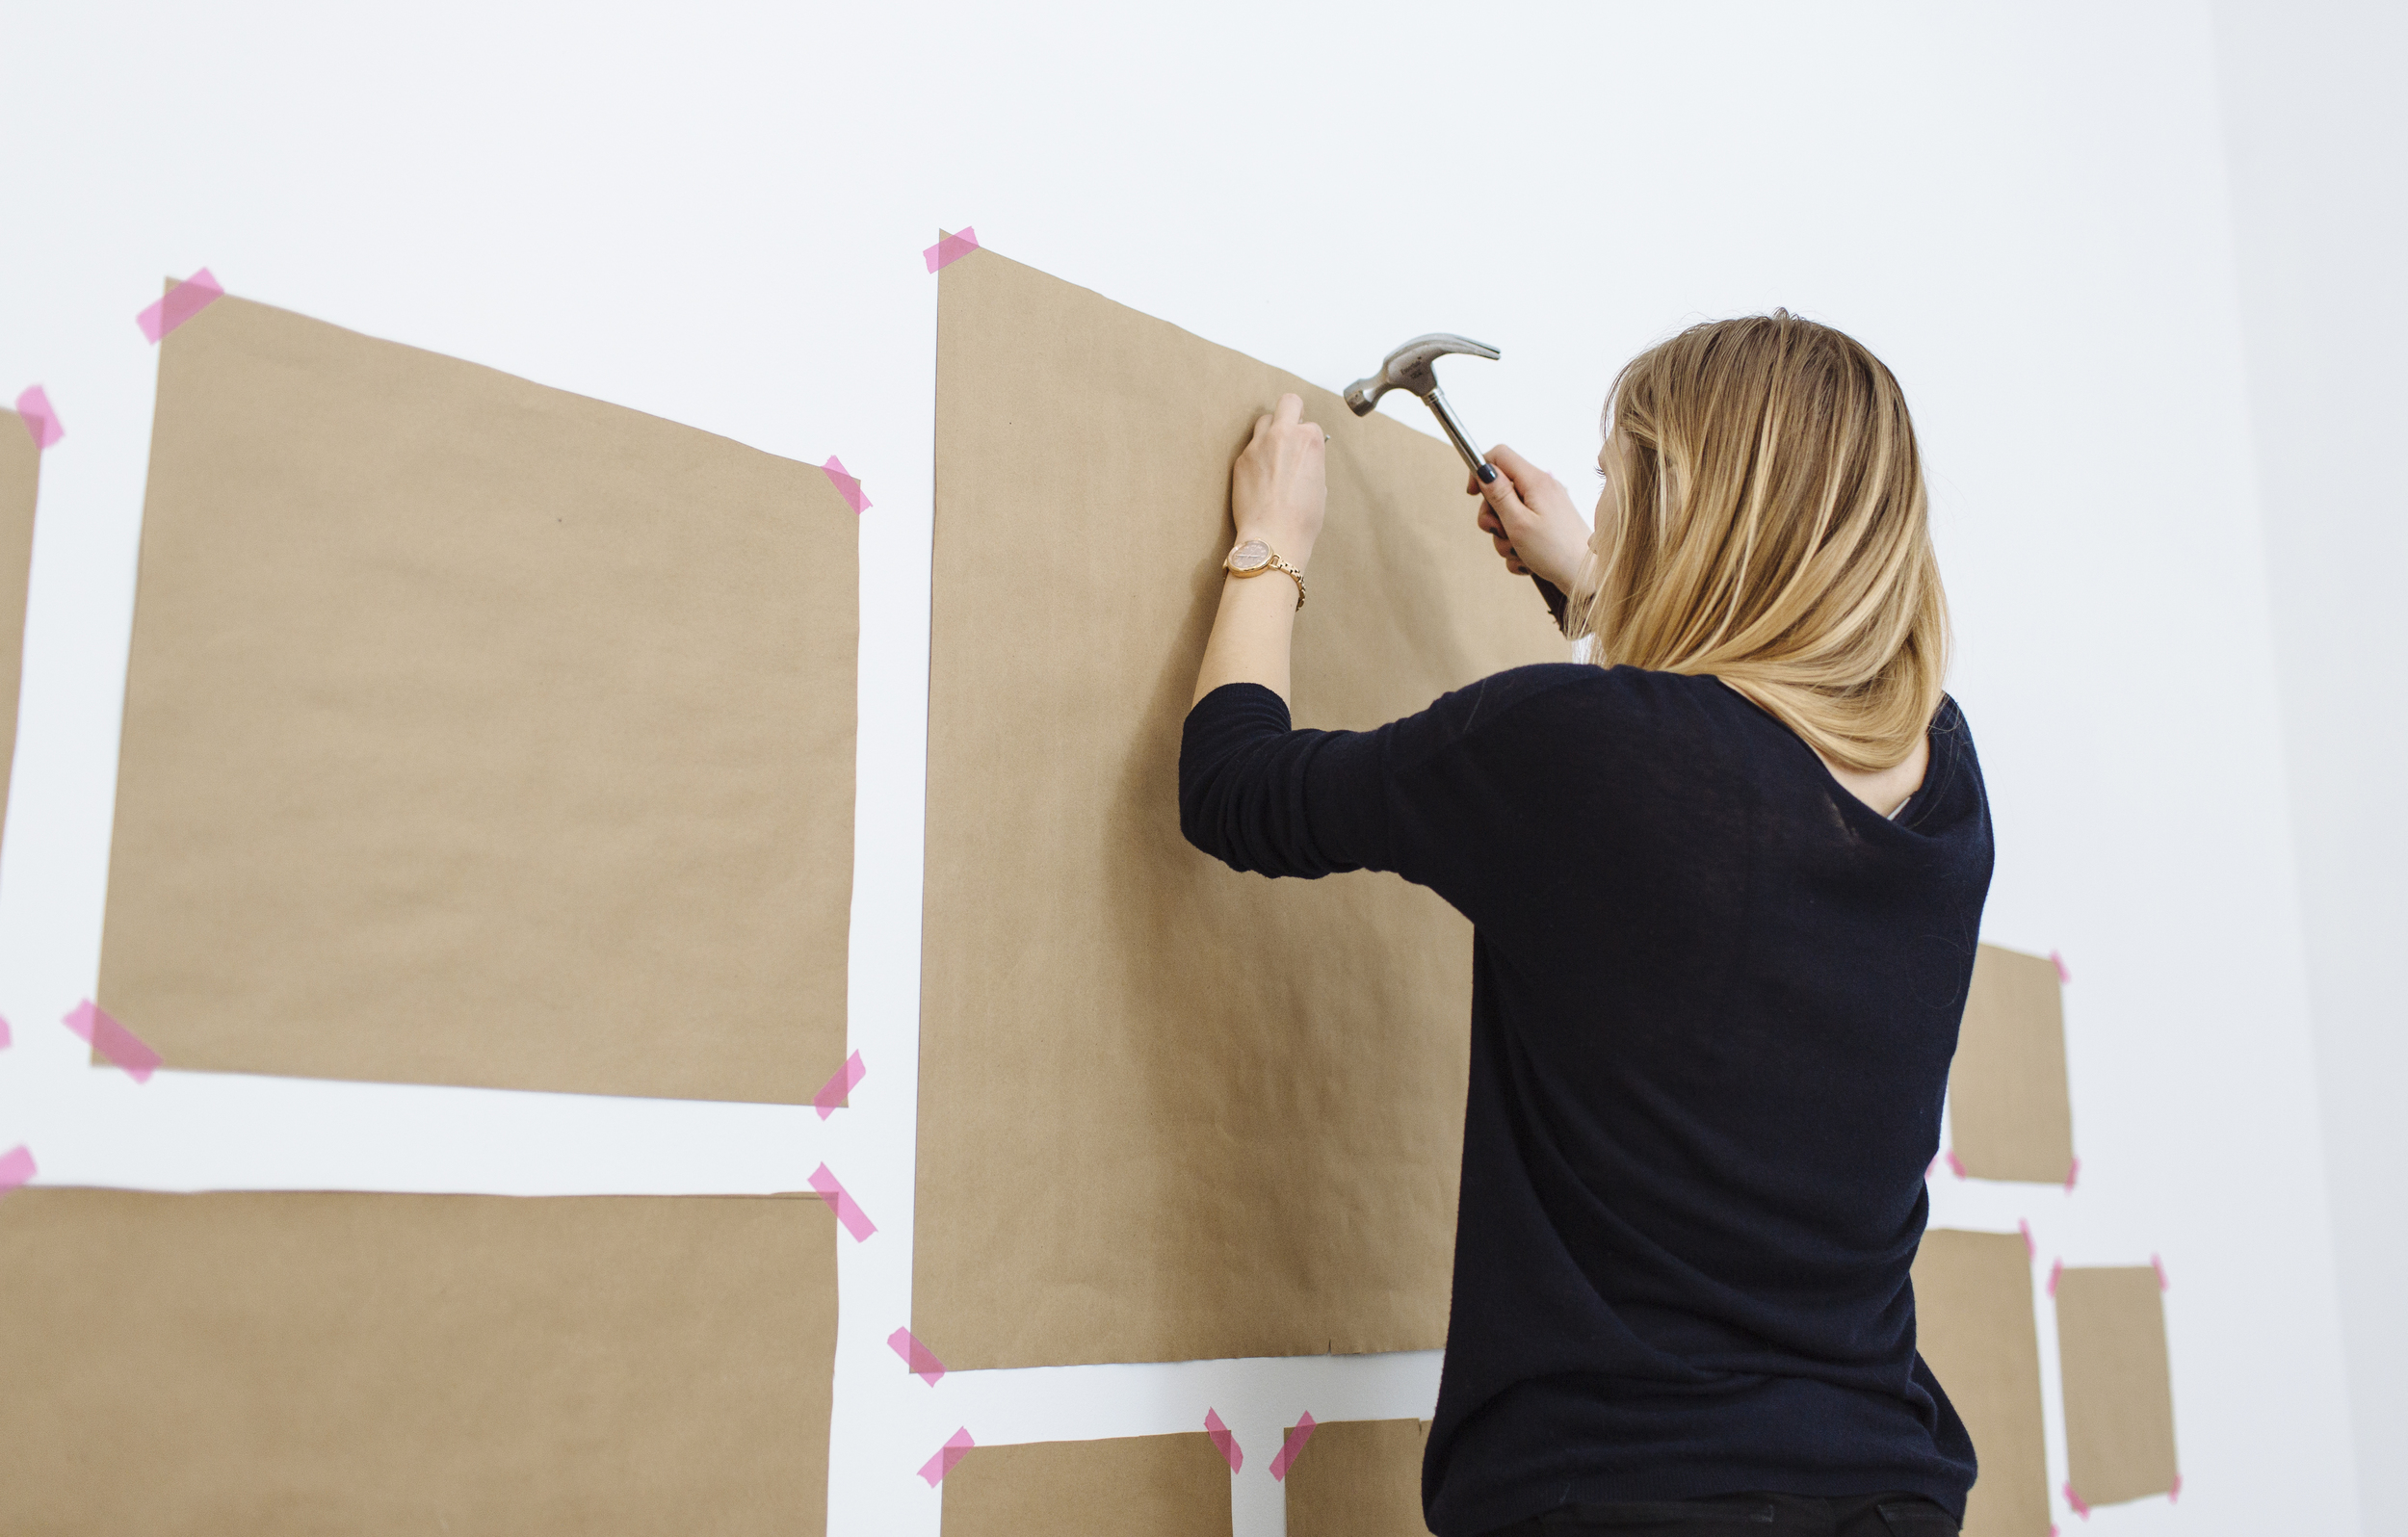
Step 3 - The Mockup

Next, to be sure that your composition looks good on the wall and that the height of it feels right, mock it up on the wall with paper. Trace each frame onto a piece of kraft or tissue paper, trim to size, and tape to the wall in your desired order. Ask yourself, is it grouped around nearby furniture appropriately? Is it a comfortable height? Does it fill the space appropriately? For our example, we wanted the composition to extend a few inches lower than the dining chairs that will sit at the dining table in front of it, and our measurements checked out perfectly. Note that this step is optional, but it helps alleviate error (i.e., unwanted nail holes)!
Step 4 - The Frame

If you haven’t already, now’s the time to frame all your art. In the example shown, we had enough frames and art pieces that we could be flexible with the composition and switch them out as needed, so inserting art in frames was our last step before hanging.
Step 5 - Hammer & Hang
One perk of using paper mock-ups is making nail placement easy. You can mark each paper with the spot where the frame’s nail should be placed, and when the paper is on the wall, hammer it directly into the mark on the paper, tearing it away after. Then comes our favorite part — hanging those glorious frames on that glorious wall. Oh the satisfaction!
Step 6 - Enjoy

You did it! Prepare for compliments. You earned it.
The Details - How to Get The Frames For A Gallery Wall Like This?
All of the frames in this beautifully created gallery wall are from the Mountary range of frames and can be ordered online, or if you're in New York, SF Bay Area and Seattle you can have our White Glove In-Home framer come to you.
The following frames were used in this gallery wall by our friends at Homepolish, our newest partner, an incredible service that makes the luxury of an interior designer available to any budget. We love their mutable aesthetic, their sense of humor and their truly dreamy projects.
Photos by Helena Price
There are 16 frames in the gallery wall:
7” x 5”
2” Mat - White
Slim - Natural Wood
11” x 17”
2” Mat - White
Slim - Black
21” x 21”
3” Mat - White
Deep - Black
21” x 15”
Slim - Black
7” x 5”
2” Mat - White
Slim - Natural Wood
7” x 5”
2” Mat - White
Slim - White
18” x 12”
Slim - Natural Wood
10” x 8”
Medium - White
8” x 10”
3” Mat - White
Slim - Black
5” x 7”
1” Mat - White
Slim - Black
18” x 12”
Slim - Natural Wood
10” x 8”
Medium - White
7” x 5”
2” Mat - White
Slim - Natural Wood
10” x 8”
Deep - Black
10” x 8”
3” Mat - White
Slim - Natural Wood
7” x 5”
2” Mat - White
Slim - White